Home > Ad Timer
Table of Contents
Video
COMING SOON
Introduction
This is a detailed tutorial on how to create an on-screen ad timer widget. This timer is built in OBS using the plugins listed under the Requirements section and is controlled using Streamer.Bot. All OBS scene imports and Streamer.Bot code for my own timer will be provided and can be used as is or as an example template to build your own.
Download Code
Requirements
- OBS (Version 31.0.0 or later)
- OBS Plugins
- Move - Required for the timer and to animate progress bar
- OBS Shaderfilter - Custom user-created shaders for the progress bar and other cosmetic details
- Source Copy - Required to import OBS scenes
Installation
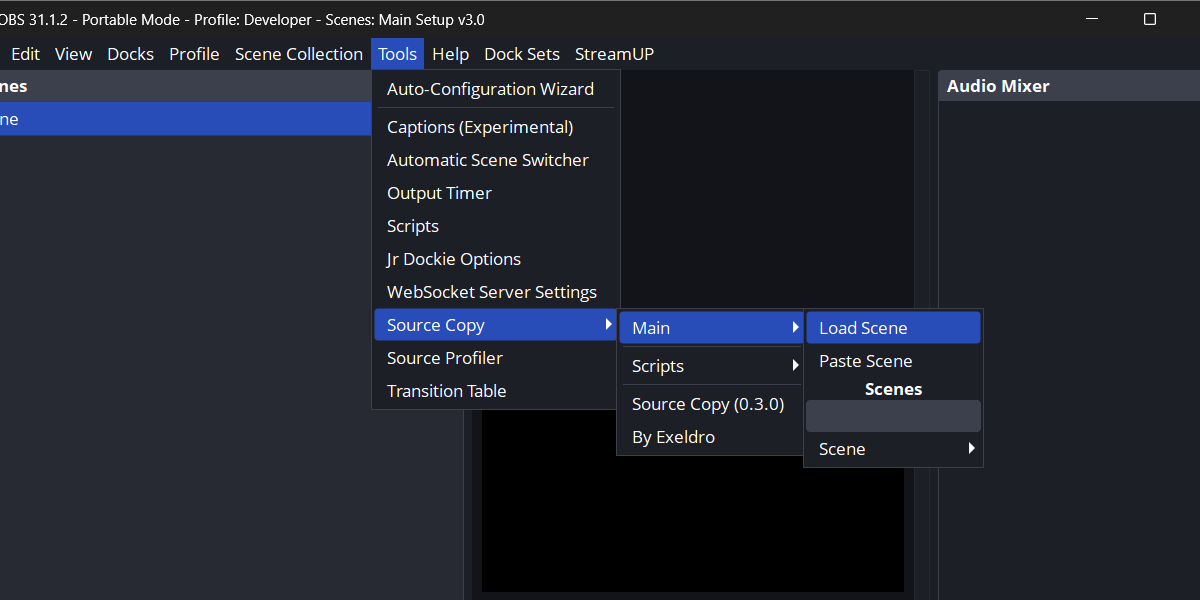
Extract the Zip file. There should be two files available in the folder: Widget-Ad Timer-OBS and Widget-Ad Timer-SB. The OBS file is the import scene for your OBS setup, and the SB file is the import actions for your Streamer.Bot client. Before importing the OBS file, make sure all required plugins listed in the Requirements section are installed. In OBS, click on the Tools option, Source Copy, and then Load Scene (Figure 1).
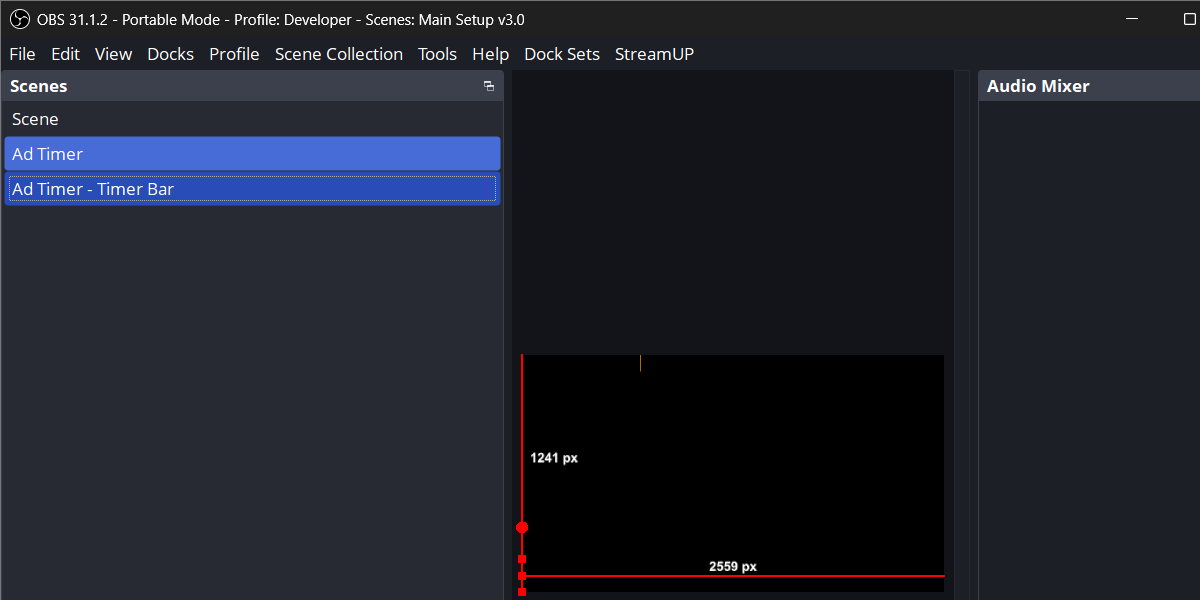
Locate Widget-Ad Timer-OBS and open it. There should be two imported scenes in the Scenes List of your OBS setup (Figure 2). Do not rename the scenes and sources as they are referenced in the Streamer.Bot code and will not function properly if changed. For this widget to appear in other scenes, it is recommended to add the Widget - Ad Timer scene to the destined scene via nested scenes or the Downstrean Keyer plugin.
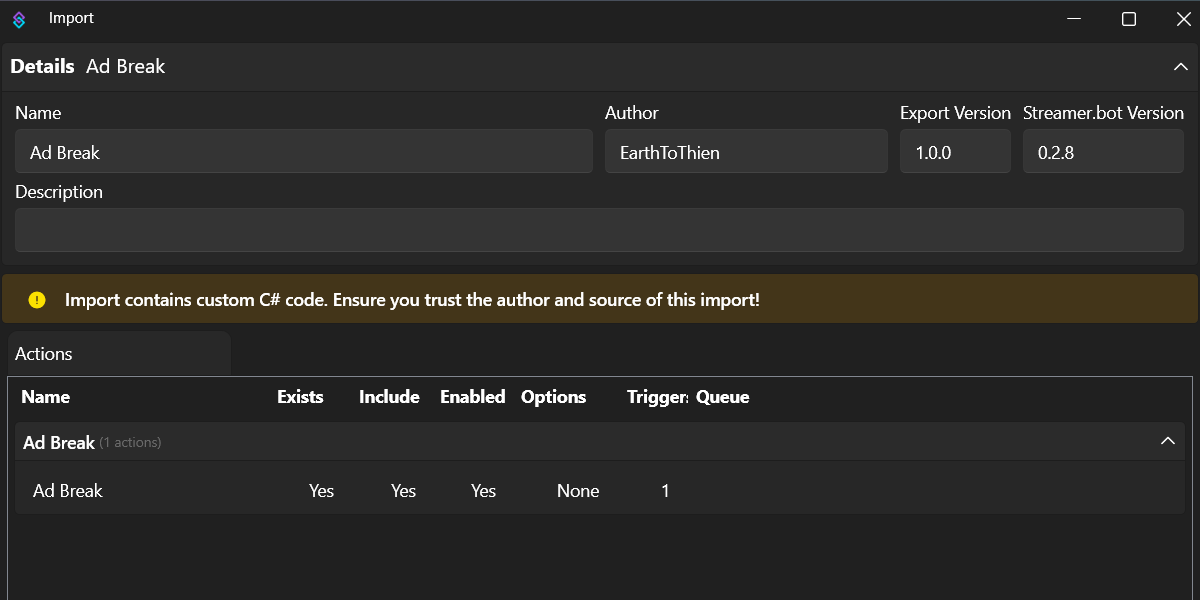
In the Streamer.Bot client, click on the Import option in the top menu. Drag Widget-Ad Timer-SB file into the Import String field. If done correctly, the Import Actions window should match the following image (Figure 3).
Tutorial
The following sections explains how each element of my Ad Timer Widget was designed and functions. Example files are provided in the Download Code section. You can use the Ad Timer Widget as provided or use it as a template to design your own. If you maintain the naming conventions, you will be able to use the provided Streamer.Bot code. Otherwise, you will need to make adjustments accordingly.
Timer
The timer is a Text Source (Ad Timer - Clock) with two Move Value source filters from the Move plugin (Figure 4). These filters will be used to control the source and function similarly to keyframes in an animation software. Each filter will serve as a set point for the source and the duration of time to move it to that set point.
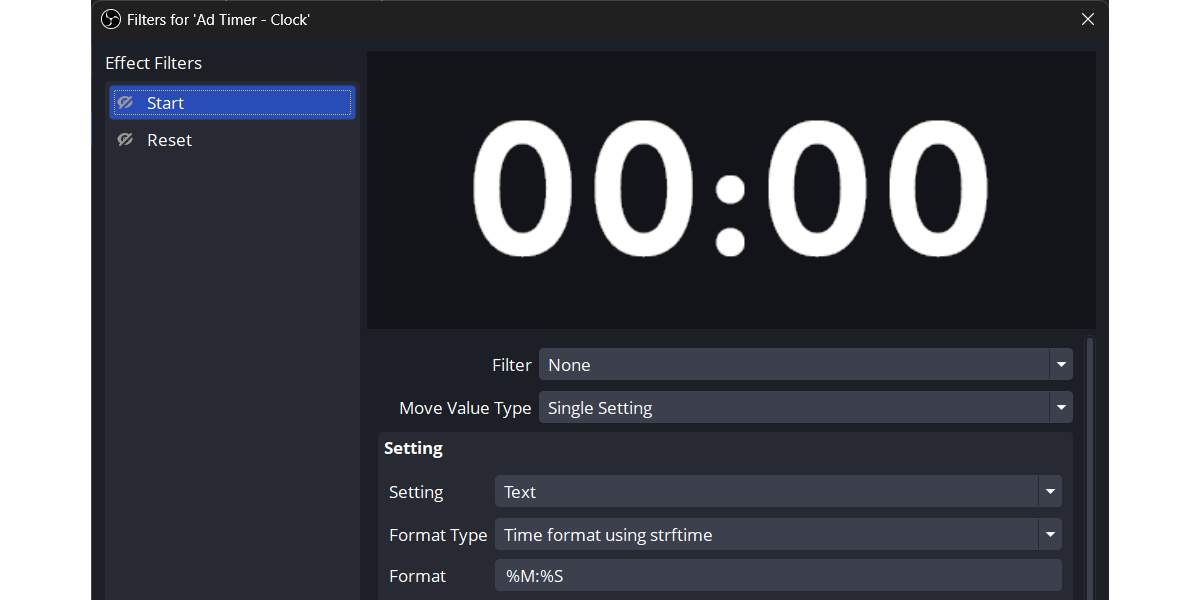
The first filter (Start) is used to initiate the countdown timer. Figure 5 shows the settings used for this filter. The value field is the endpoint for the timer in seconds and will be set to 0 since the timer will be counting down. The Custom Duration field is the time in milliseconds (ms) for the source to go from the initial set point to the endpoint. This will be controlled by the Streamer.Bot code.
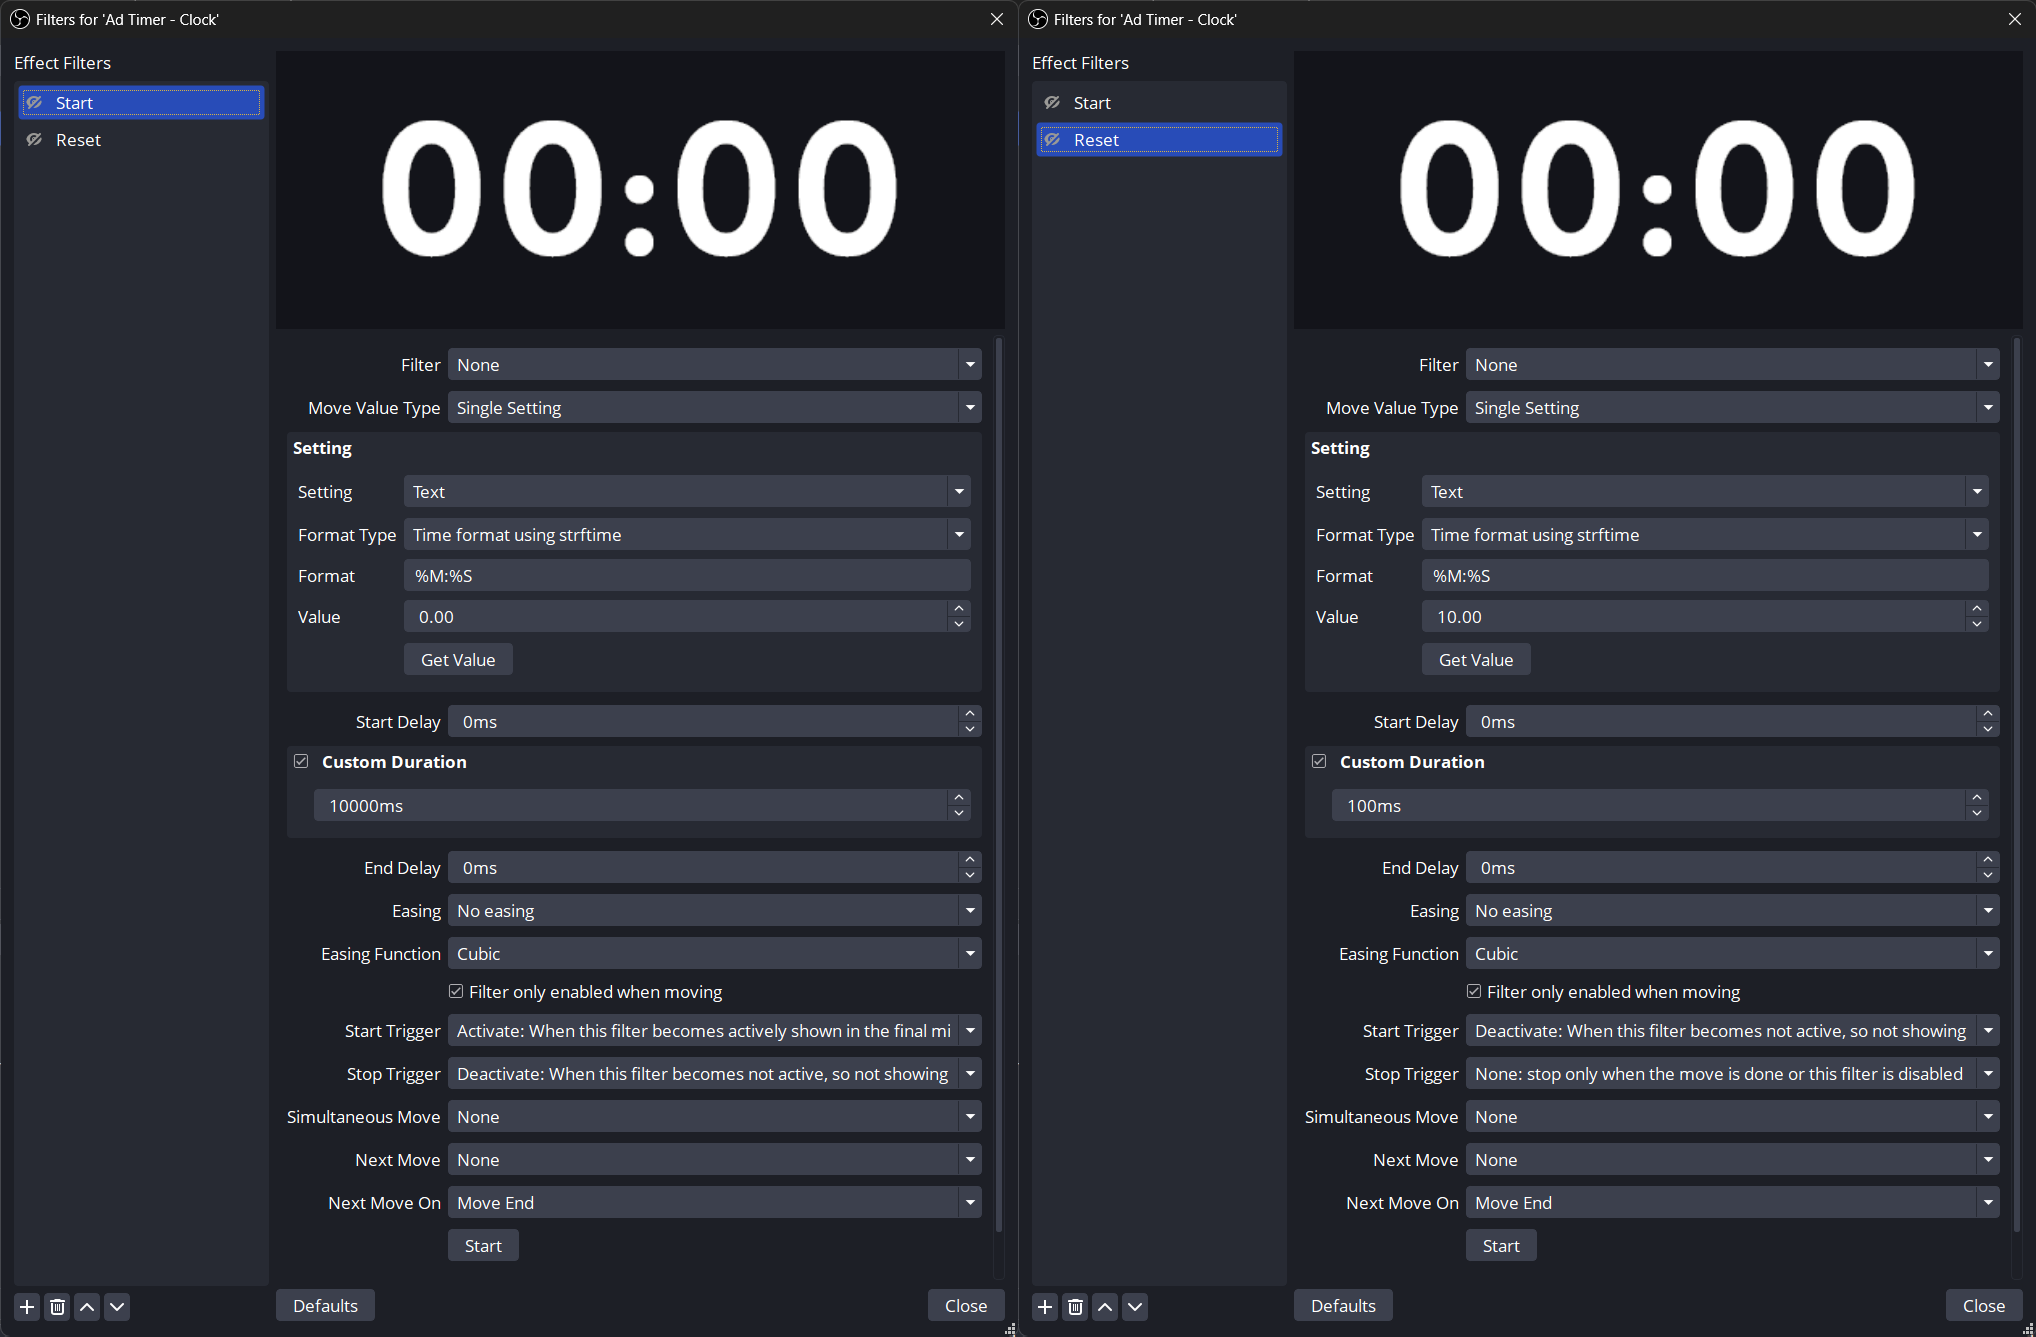
The second filter (Reset) is used to set the timer and shares similar settings to the Start filter. For this filter, Streamer.Bot will control the value field to set the timer to the appropriate start value. This allows you to make changes to your Twitch Ad settings and have Streamer.Bot adapt Ad Timer Widget accordingly.
Progress Bar
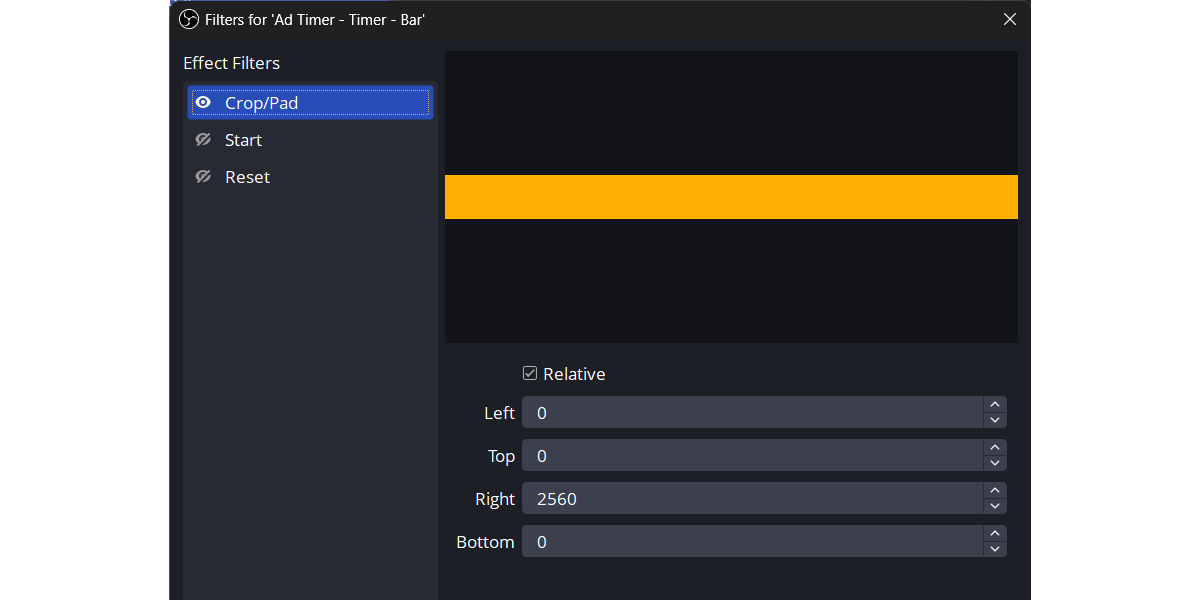
For the circular progress bar of the Ad Timer Widget, another scene was created (Widget - Ad Timer - Timer Bar) containing a Color Source with a Crop/Pad filter and two Move Value source filters controlling it. The scene will also have a filter using the OBS Shaderfilter. The dimensions of the Color Source will have a width to match the base canvas width of my OBS setup and a height set to 200.
Disclaimer: My OBS base canvas is currently set to 2560x1440. All dimensions and settings used for this widget are based on this base canvas size.
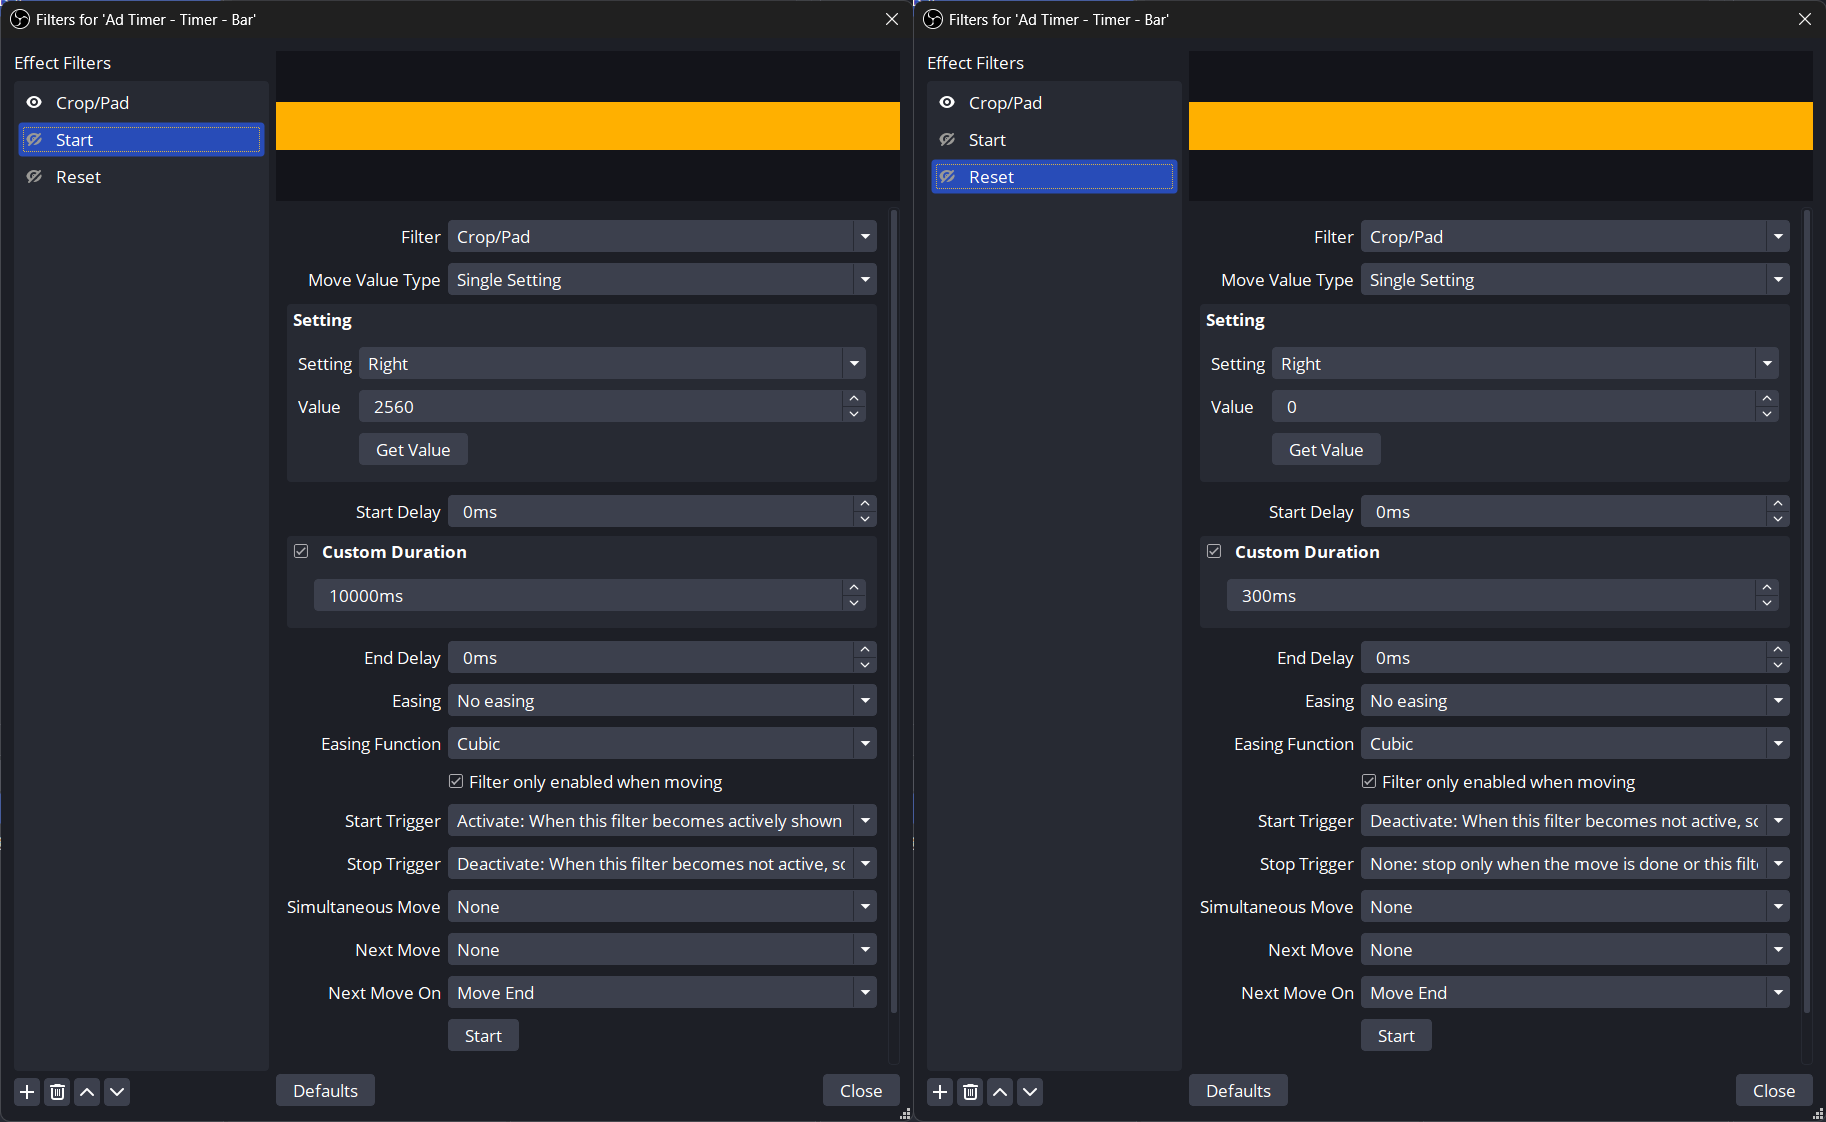
This bar is positioned at the bottom of the scene. For filters of the Color Source, I added a Crop/Pad filter and two Move Value filters labeled Start and Reset. Both Start and Reset filters are linked to the Crop/Pad filter and have the Move Value Type set to Single Setting. The settings for each filter are shown in Figures 6 and 7. The Value field for the Start filter is set to the width of the base canvas (full crop) while Value field for the Reset filter is set to 0 (no crop). For the Start filter, the Custom Duration will match the duration set of the corresponding filter for the timer's Text Source. This will also be controlled by the Streamer.Bot code.
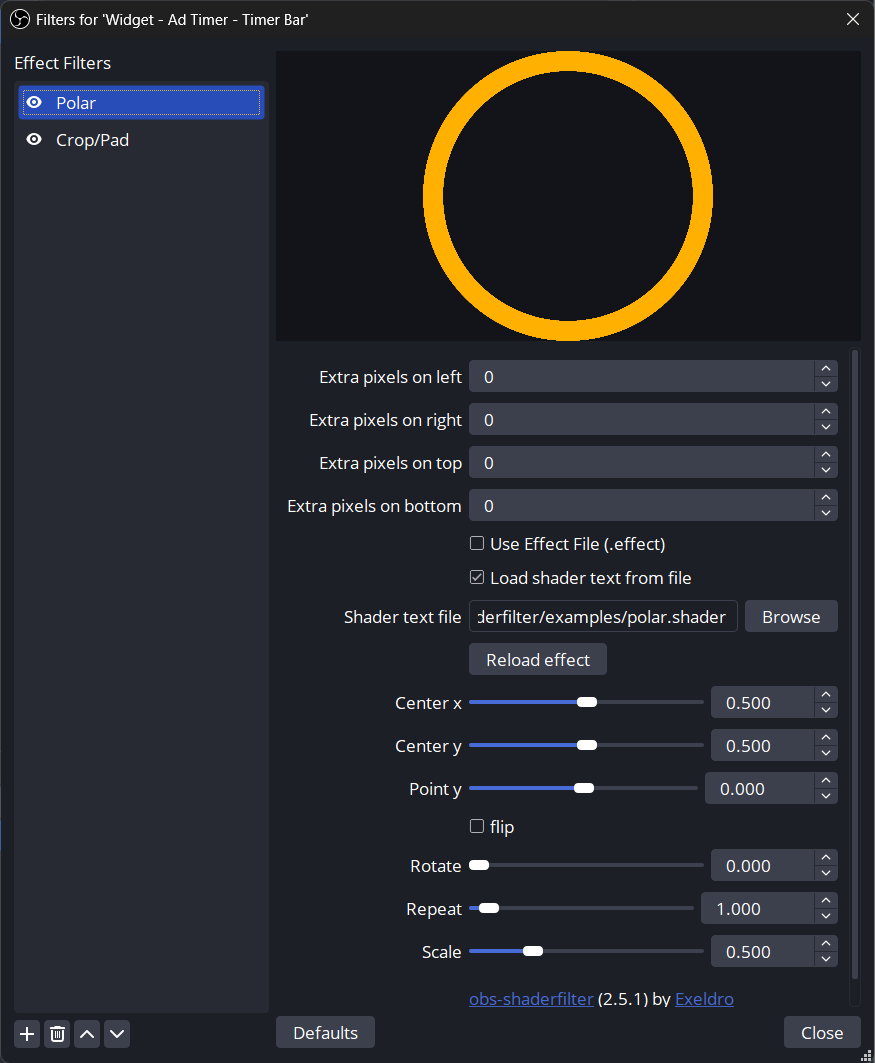
Finally, to achieve the circular look of the progress bar, the Polar Shader is applied as a filter to the scene using the OBS Shaderfilter (Figure 8). These are user-created shaders that can apply different effects and cosmetic looks to your scenes and sources. The Polar Shader converts the rectangular scene into a circular one. The size of the progress bar can be adjusted by moving the Color Source towards the center of the scene, and the thickness can be adjusted using the height of the Color Source.
Finally, all positional and cosmetic adjustments for the Ad Timer widget is made in the Widget - Ad Timer scene.
Streamer.Bot
The SB file provided in the Download Code contains the action required to run the Ad Timer Widget. In order to trigger the Ad Break action, the Twitch Ad Run trigger needs to be assigned to the action.
The trigger provides two variables used in the code, adLength (ad length in seconds) and adLengthMs (ad length in milliseconds). In the Execute Code (Set Ad Timer) sub-action, these two variables are imported into the C# code to set the time and animation duration of the Timer and animation duration of the Progress Bar. In order to set these filters, the code utilizes the ObsSendRaw function (Figure 9).
	public void SetTimer(string sourceName, int adLength, int adLengthMs)
	{
		JObject reset = new JObject();
		reset["sourceName"] = sourceName;
		reset["filterName"] = "Reset";
		reset["filterSettings"] = new JObject();
		reset["filterSettings"]["setting_float"] = adLength;
		reset["overlay"] = true;
		CPH.ObsSendRaw("SetSourceFilterSettings", reset.ToString(), obsConnection);

		//Set duration of Timer
		JObject start = new JObject();
		start["sourceName"] = sourceName;
		start["filterName"] = "Start";
		start["filterSettings"] = new JObject();
		start["filterSettings"]["duration"] = adLengthMs;
		start["overlay"] = true;
		CPH.ObsSendRaw("SetSourceFilterSettings", start.ToString(), obsConnection);

	}

	public void SetTimerBar(string sourceName, int adLengthMs)
	{
		JObject req = new JObject();
		req["sourceName"] = sourceName;
		req["filterName"] = "Start";
		req["filterSettings"] = new JObject();
		req["filterSettings"]["duration"] = adLengthMs;
		req["overlay"] = true;

		CPH.ObsSendRaw("SetSourceFilterSettings", req.ToString(), obsConnection);
	}
SetTimer sets the time and animation duration for the timer and SetTimerBar sets the animation duration for the progress bar.With this setup, the Ad Timer Widget may adapt to whatever length of ads you manually trigger or set in your Twitch dashboard. How it works is when ads begin to run, the ad length information is provided to Streamer.Bot through the Twitch Ad Run trigger. The Execute Coded (Set Ad Timer) sub-action sets the Start and Reset filters for the sources in OBS. Once everything is set, the second sub-action, OBS Studio Source Visibility State, shows the widget on screen and triggers the timer and progress bar animation. After the set ad length, the last sub-action, another OBS Studio Source Visilibity State, hides the widget. When setting the Widget - Ad Timer in its destined scene using nested scenes, make sure the scene setting for both OBS Studio Set Source Visibility State is set to the corresponding scene. You can also add a show and hide animation to this source.